Understanding Vapor Barrier Installation
What is a Vapor Barrier?
A vapor barrier is a material designed to resist the passage of moisture and prevent water vapor from entering certain areas, typically in construction environments like basements and crawl spaces. These barriers are essential in maintaining the integrity of a building by protecting it from moisture damage that can lead to mold growth, wood rot, and structural problems. Typically composed of polyethylene plastic, a vapor barrier acts as a shield between moisture sources and living spaces, helping to maintain a stable indoor environment.
Understanding Why Vapor Barrier Installation is Important
The importance of Vapor Barrier Installation cannot be overstated. In areas with high humidity or excess moisture, a vapor barrier becomes a critical component of moisture control. It helps regulate humidity levels, enhances air quality, and significantly reduces the risk of pest infestations that thrive in damp conditions. Additionally, by preventing moisture-related issues, you can prolong the lifespan of your building materials and reduce long-term repair costs.
Common Myths About Vapor Barrier Installation
Several myths surround vapor barriers that can mislead homeowners and builders alike. One prevalent myth is that vapor barriers are unnecessary in areas with low humidity; however, moisture can still accumulate in these environments, often unnoticed. Another common misconception is that thicker barriers always provide better protection, but the effectiveness of the vapor barrier also depends on the material’s properties and proper installation. Understanding these myths is crucial to making informed decisions regarding moisture control.
Types of Vapor Barriers and Their Uses
Different Materials for Vapor Barrier Installation
Vapor barriers come in various materials, each with distinct properties tailored to different environmental conditions. Common types include:
- Polyethylene: The most widely used vapor barrier, typically available in thicknesses ranging from 6 to 20 mils. It is affordable and effective in most residential applications.
- Foil: Reflective, metallic foil barriers are used primarily in warm climates to reduce heat loss and moisture ingress.
- Rubberized Asphalt: A flexible, sticky material ideal for poorly insulated areas, providing excellent adhesion and sealing properties.
- Spray-On Barriers: These liquid barriers can be applied directly to surfaces and form an impermeable coat, suitable for irregular surfaces.
Choosing the Right Vapor Barrier for Your Needs
Selecting the right vapor barrier involves understanding your specific environmental conditions, the type of building, and the areas needing protection. For instance, in regions with high ground moisture or flooding risks, thicker polyethylene or rubberized asphalt barriers might be warranted. Conversely, for conditioned attics, foil barriers could be highly effective due to their reflective properties. Always consider local climate conditions and building codes when selecting materials.
Comparative Analysis of Vapor Barrier Types
When comparing vapor barrier materials, consider several factors such as permeability, thickness, cost, and ease of installation. Polyethylene barriers offer a good balance of cost and effectiveness, whereas foil and rubberized options may excel in specific applications but could be more expensive and challenging to install. Analyzing these aspects will help prioritize which vapor barrier aligns best with both your budget and requirements.
Step-by-Step Guide to Vapor Barrier Installation
Preparation for Installation
Proper preparation is essential for a successful vapor barrier installation. Begin by evaluating the installation area for any existing moisture problems or contaminants. Clear any debris and perform necessary repairs on the surface to ensure it is smooth and free of sharp objects that could puncture the barrier. Additionally, assess the humidity levels to determine if a vapor barrier is needed; ideally, the relative humidity should be below 60%.
Installation Techniques for Best Results
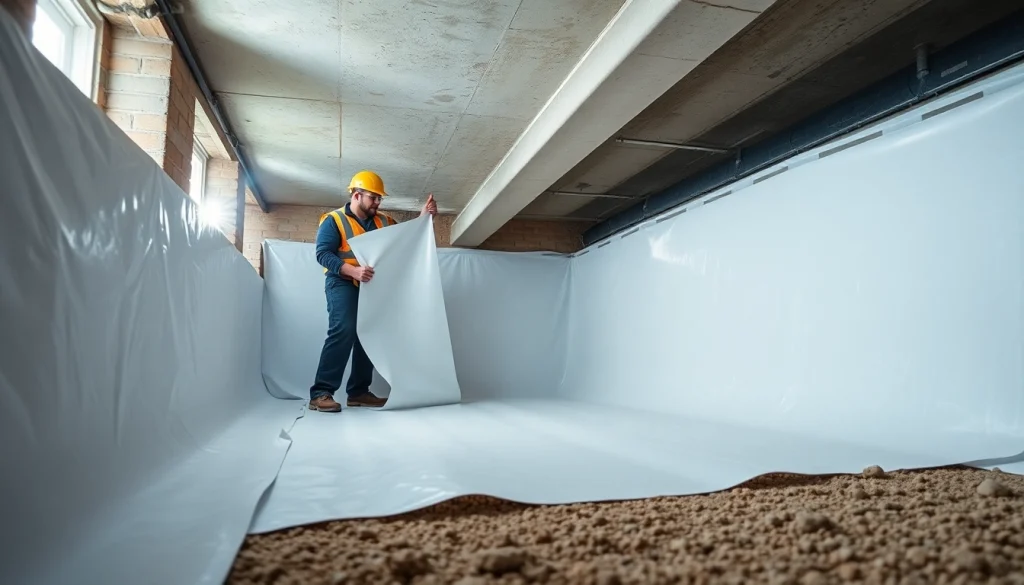
Once prepared, follow these steps for effective vapor barrier installation:
- Lay the vapor barrier flat on the ground, ensuring it covers the entire area with at least 12 inches of overlap at seams.
- Use a staple gun or tape to secure the edges to walls and ensure your barriers are sealed tight against the structure.
- For crawl spaces, extend the barrier up the wall at least 6 inches and seal it with adhesive or tape.
- Seal all seams and joints thoroughly with specialized tape designed for vapor barriers.
- Install ground drainage solutions if necessary to prevent moisture accumulation beneath the barrier.
Post-Installation Checks and Maintenance
After installation, ensure that the vapor barrier is intact without gaps or tears. Conduct a routine inspection every six months to monitor for wear, punctures, or any signs of moisture buildup. If you notice any issues, address them immediately to maintain the effectiveness of the barrier. In areas with extreme weather conditions, consider more frequent checks, especially after heavy rains or snowmelts.
Common Challenges in Vapor Barrier Installation
Identifying Moisture Issues
Before installation, it’s crucial to identify any existing moisture issues in and around your home. Signs of high moisture levels include mold growth, a musty odor, and condensation on surfaces. Performing a moisture test with a hygrometer can provide quantitative readings to help evaluate whether a vapor barrier is needed.
Dealing with Ground Water and Drainage
High groundwater levels pose a significant challenge during vapor barrier installation. Drainage solutions, such as French drains or sump pumps, should be evaluated and installed before laying down the vapor barrier. Proper drainage helps mitigate the risks of groundwater pressure that could compromise the vapor barrier’s effectiveness.
Preventing Damage to the Installation
To ensure the longevity of your vapor barrier, consider environmental factors like soil movement and animal activity. Use protective measures, such as foam blocks or wooden stakes, to hold the barrier in place while also securing it against potential damage from pests and rodents. Regular checks will help you address any concerns that may arise over time.
FAQs About Vapor Barrier Installation
How do I know if I need a vapor barrier?
If you experience high humidity, dampness, or mold in your home, particularly in basements or crawl spaces, you likely need a vapor barrier to control moisture ingress.
What materials are best for vapor barrier installation?
Polyethylene is the most common and effective material, but rubberized asphalt or foil options may be better for specific applications based on climate and insulation strategy.
How long does it take to install a vapor barrier?
The installation process can take a few hours to a full day, depending on the size of the area and the complexity of the installation.
Can I install a vapor barrier myself?
Yes, with proper preparation and following installation guidelines, many homeowners can successfully install a vapor barrier themselves, though professional assistance is recommended for complicated spaces.
What maintenance does a vapor barrier need?
Routine inspections for leaks, tears, or moisture accumulation are essential. Repair any damage immediately to maintain its effectiveness in controlling moisture.